
April in Ottawa means decks to clean, driveways to rinse down, and siding to wash off a winter’s worth of grime. If you’re pulling your pressure washer out of storage for the first time since last fall, don’t just connect the hose and fire it up.
A pressure washer that sat through an Ottawa winter without being properly prepared for storage can have problems that aren’t obvious until the machine is running, and some of those problems, particularly pump damage from frozen water, can be expensive if they go unnoticed. A few minutes of checks before the first start of the season can save a significant repair bill and, in some cases, prevent the machine from being written off entirely.
This guide covers everything to check, in order, before running your pressure washer for the first time in spring.
Why Ottawa Winters Are Particularly Hard on Pressure Washers
A lawn mower or trimmer sitting in a cold garage over winter mainly risks fuel degradation and a stale carburetor. A pressure washer carries that same risk, but it also has a pump that holds water, and water expands when it freezes.
If your pressure washer was stored with water remaining in the pump, that water may have frozen and expanded during one of Ottawa’s extended cold stretches. Depending on the severity, frozen water can crack the pump housing, damage the valves and seals inside the pump, or split a hose connection. None of this is immediately visible from the outside, and a machine with internal pump damage will either fail to build pressure, leak visibly once water starts flowing, or in severe cases, not start at all because the pump has seized.
This is why the pump gets its own section in this guide, and why it gets checked before the engine.
Step 1: Inspect the Pump Before Connecting Anything
Before connecting the garden hose or attempting to start the machine, give the pump a visual inspection.
Look for:
- Visible cracks in the pump housing. These are most common at the inlet and outlet ports where water pressure concentrates. Even a hairline crack will leak under pressure and worsen quickly.
- Cracked or brittle hose connections. The hoses that connect to the pump’s inlet and outlet ports can split from freeze-thaw stress. Squeeze them gently and check for cracks or stiffness.
- Damaged O-rings or seals at the inlet port. The rubber O-ring inside the garden hose inlet is the first seal in the system. If it’s cracked, flattened, or missing, it will leak from the moment water starts flowing.
If you find visible cracks in the pump housing, this is the point to stop and contact a repair shop before going any further. Running a cracked pump will make the damage worse and may push the repair into replacement territory.
If the pump looks intact, move on.
Step 2: Check the Engine Oil
Gas-powered pressure washers have 4-stroke engines that require engine oil separate from the fuel, the same as a lawn mower. Oil degrades over a season of use and during storage, and running an engine on old, degraded oil accelerates wear.
Locate the oil dipstick or fill cap, typically on the side or top of the engine. Pull it out, wipe it clean, reinsert it fully, and pull it out again to get a clean reading. The oil should be at or near the full mark. If it’s low, top it up with the grade specified in the operator’s manual before starting.
Check the oil’s condition as well. Fresh oil is light amber to golden. Oil that is very dark, black, or has a gritty texture has been in service too long and should be changed before the season begins. Running an entire season on oil that was already degraded going in is one of the fastest ways to shorten an engine’s life.
Step 3: Address the Fuel
Like every piece of gas-powered equipment that sat through an Ottawa winter, your pressure washer’s fuel has almost certainly degraded. Gasoline begins to break down within 30 days of being exposed to air. After five to seven months, old fuel leaves varnish deposits in the carburetor that restrict fuel flow and prevent reliable starting.
Check the fuel in the tank. If it’s from last season, drain it and start with fresh gasoline rather than trying to start on degraded fuel. A clogged carburetor is the most common reason a pressure washer won’t start after winter storage, and it almost always traces back to old fuel.
If the machine still won’t start cleanly after fresh fuel, the carburetor likely has varnish deposits already built up from the old gas. A professional carburetor service is the reliable fix at that point. Attempting to start repeatedly on a gummed carburetor won’t clear the varnish and can draw more contaminated fuel further into the system.
For future seasons: either run the tank dry before storage or add a fuel stabilizer to a full tank of fresh gas and run the engine for a few minutes to circulate the treated fuel through the carburetor. Both approaches prevent the degradation problem at the source.
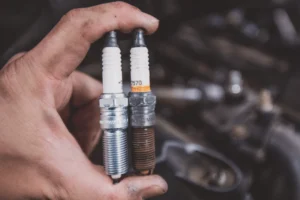
Step 4: Inspect and Replace the Spark Plug
The spark plug on a gas pressure washer is subject to the same wear and carbon buildup as any small engine. After a full season of use and a winter in storage, it’s worth pulling the plug and taking a look before starting.
A healthy plug has a light grey or tan electrode tip. Carbon deposits, corrosion, a cracked porcelain insulator, or a worn electrode tip all indicate the plug should be replaced. Spark plugs are inexpensive and the swap takes a few minutes. Given how small a role the cost plays relative to the inconvenience of a no-start in mid-April, replacing the plug annually as part of spring startup is a reasonable habit.
Make sure the replacement plug matches the part number on the old one, or check the operator’s manual for the correct spec. The wrong heat range can cause performance issues and, over time, engine damage.
Step 5: Check the Air Filter
The air filter prevents dirt and debris from entering the engine. A clogged air filter restricts airflow, causes the engine to run rich, and contributes to starting problems and reduced power output.
Locate the air filter housing, typically near the carburetor. Remove the cover and pull out the filter. Foam filters can be washed in warm soapy water, rinsed, dried fully, and lightly oiled before reinstalling. Paper filters should be replaced if they’re visibly dirty or you can’t see light through them when held up to a light source.
If the filter has been in service for more than a season, replacement is the cleaner call regardless of how it looks.
Step 6: Check All Hoses, Connections, and the Spray Gun
With the engine checks complete, inspect the rest of the machine before connecting the water supply.
Work through each of the following:
- Garden hose inlet O-ring: This small rubber ring inside the water inlet port is easy to miss and quick to cause problems if it’s damaged. If it’s cracked, hardened, or deformed, replace it before connecting the hose.
- High-pressure hose: Run your hand along the full length of the hose and look for cracking, kinks, or bubbling in the hose wall. A high-pressure hose failure under operating pressure is a safety concern, not just a maintenance issue. If there’s any doubt about its condition, replace it.
- Spray gun and wand: Check that the trigger mechanism moves freely and that the safety lock works correctly. Inspect the connection points for cracks or corrosion.
- Nozzle tips: Rinse the nozzle tips with clean water and check the orifices for debris. A partially blocked nozzle causes uneven spray patterns and puts unnecessary back-pressure on the pump.
Step 7: Flush the Pump Before Starting the Engine
This step is skipped by most homeowners and it’s one of the most important. Before starting the engine, connect the garden hose, turn on the water supply, and squeeze the spray gun trigger for 20 to 30 seconds with the engine off.
This does two things. First, it flushes any debris or residual antifreeze out of the pump. Second, it purges air from the pump and hose before the engine starts, which protects the pump from running dry even briefly during startup. Running a pressure washer pump without water flowing through it, even for a few seconds, can cause immediate and significant damage to the pump’s internal valves and seals.
Get into the habit of connecting the water supply and flushing the pump before every start, not just the first one of spring.
Step 8: The First Start of the Season
With all checks complete, you’re ready to start. Follow the startup procedure in your operator’s manual for your specific model. In general:
- Confirm the water supply is connected and turned on fully.
- Set the choke to the start (closed) position for a cold engine.
- Turn the fuel valve to the on position.
- If the engine has a primer bulb, push it three to five times.
- Pull the starter cord firmly.
A well-maintained machine should start within two to three pulls on a cold engine. If it starts and then dies quickly, a fuel system issue is the likely cause. If it starts and runs but the pressure is noticeably weaker than expected, there may be a pump issue, an air leak in the inlet connections, or a partially clogged nozzle.

How Legacy Small Engines Can Help
At Legacy Small Engines in Stittsville, pressure washer repairs and spring startups are a regular part of what we handle every April. Whether the issue is a gummed carburetor from old fuel, a pump that took damage over winter, or a machine that just needs a proper service before the cleaning season begins, we assess it thoroughly and give you a clear picture of what it needs before any work is done.
We service all major brands including Honda, Briggs & Stratton, Generac, Craftsman, Karcher, and more. If the repair doesn’t make sense relative to the machine’s age and condition, we’ll tell you that too. (Pricing may vary. Contact us for a free upfront estimate.)
Frequently Asked Questions
Why won’t my gas pressure washer start after sitting all winter?
The most common cause is a clogged carburetor from degraded fuel. Ethanol-blended gasoline breaks down within 30 days, and after five to seven months in storage, old fuel leaves varnish deposits that restrict fuel flow. Drain the old fuel, refill with fresh gasoline, and check the spark plug before concluding the carburetor needs professional service.
Can freezing temperatures damage a pressure washer pump?
Yes, and this is one of the more expensive spring surprises for Ottawa homeowners who stored their machine without draining the pump. Water expands when it freezes, which can crack the pump housing, split seals, and damage internal valves. A visual inspection of the pump before the first startup of spring is the best way to catch this before it becomes a bigger problem.
How do I know if my pressure washer pump is damaged?
Visible cracks in the pump housing, water leaking from the pump area during operation, significantly reduced pressure output, or a starter cord that pulls with unusual resistance are all signs of pump damage. If you notice any of these, stop using the machine and have the pump assessed before continuing.
Should I use pump saver or antifreeze before storing my pressure washer for winter?
Pump saver or pump lubricant/antifreeze products are specifically designed for pressure washer storage and are the best way to protect the pump over winter. They lubricate internal components, prevent corrosion, and displace water that would otherwise freeze. Running a small amount through the pump at the end of the season takes only a few minutes and can prevent hundreds of dollars in pump damage.
My pressure washer starts but has low pressure. What’s the cause?
Low pressure after winter storage typically points to a clogged nozzle, an air leak in the inlet connections, a worn or damaged pump seal, or a partially clogged carburetor affecting engine power output. Start with the simplest check: rinse the nozzle tips and make sure the garden hose inlet connection is tight and the O-ring is intact. If pressure is still low, the pump or fuel system likely needs attention from a technician.
How often should a gas pressure washer be serviced?
At minimum, once per season. A spring service, including fresh oil, a new spark plug, air filter service, and a fuel system check, keeps the machine running reliably and catches small issues before they become expensive ones. For machines that see heavy use, a mid-season oil check is also worthwhile.
Get It Ready Before Deck Season Starts
Ottawa’s spring cleaning window is short. Between the last snow and the first hot weekend, there are usually only a few weeks to clean off the winter before it’s time to enjoy the yard rather than prep it.
Here is how to get it sorted quickly:
- Book a pick-up. We offer flat-rate pick-up and delivery across Stittsville, Kanata, Nepean, Richmond, and surrounding areas. No truck needed. Pick-up rates are on the pricing page.
- Get a proper diagnosis first. We check both the engine and the pump, give you an honest assessment of the machine’s condition, and provide a clear upfront estimate before any work begins. If the pump has taken significant damage, we’ll tell you what it would cost to repair versus what a replacement machine would run.
- Book in minutes. Call 613-899-4809 or use the form on the Legacy Small Engines contact page. Let us know the make and model, what it’s doing, and a convenient pick-up time.
Most pressure washer services are turned around within 24 to 48 hours. During the April and May peak, allow a few extra days. We will give you an honest timeline when you book.